
Real inspection photographs
Flooring inspection photos: see the area, then the detail
These flooring inspection photos show three types of evidence from actual files: rigid-core damage, hardwood observations, and tile measurements. Wider views identify the area; closer views show the detail.
On this page
1. Flooring inspection photos of rigid-core damage
The wider photograph locates the flooring near the kitchen and dining area. The closer photograph shows the fractured edge and exposed core from that same inspection.
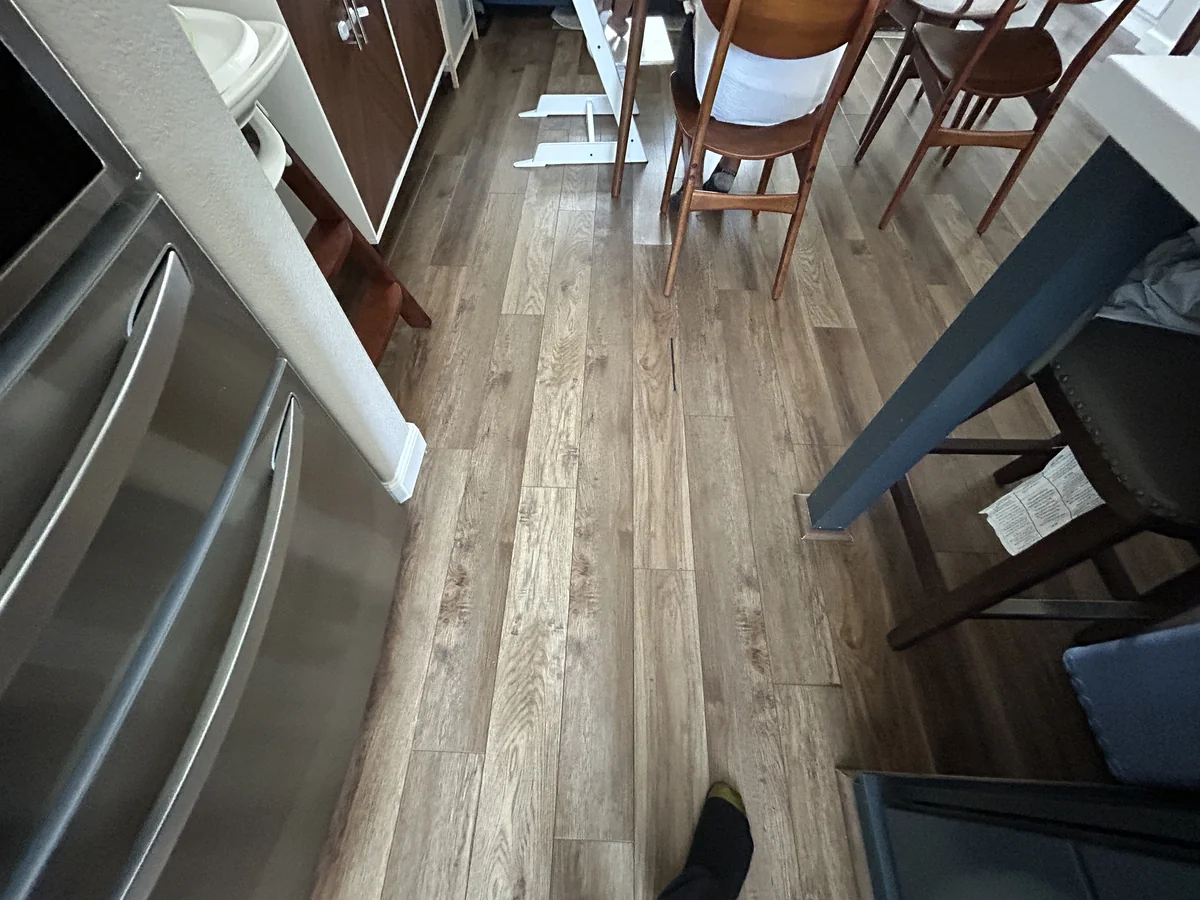
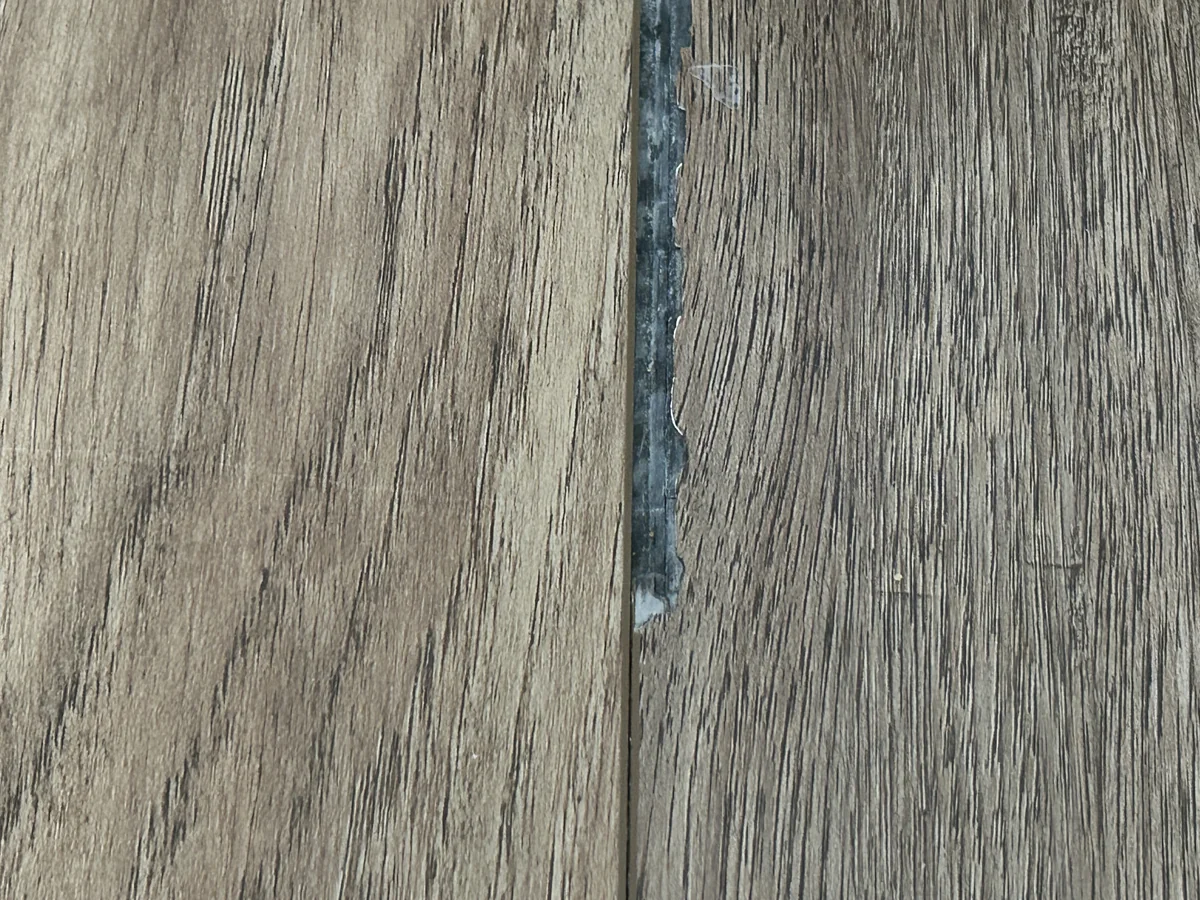
The two views answer different questions. The room view establishes the setting and the relationship to the surrounding floor. The detail shows the fractured plank edge and exposed core. A useful file keeps these views connected to the same location so the detail is not separated from its context.
An LVP floor inspection may also examine the product, joint pattern, accessible support, transitions, and installation records. The visible fracture is an observation; evaluating its cause requires the other relevant evidence. A photograph of damage alone cannot supply the complete history.
2. Hardwood observations
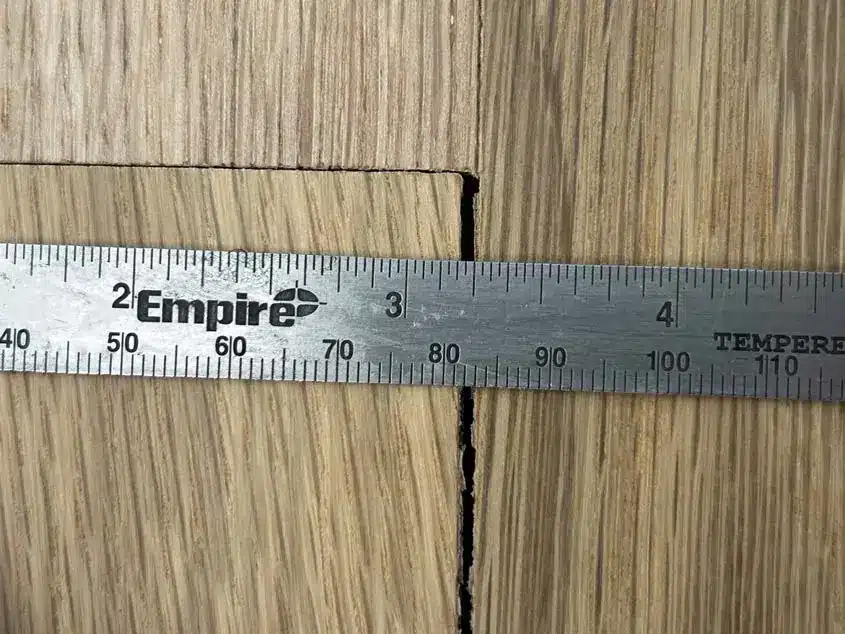
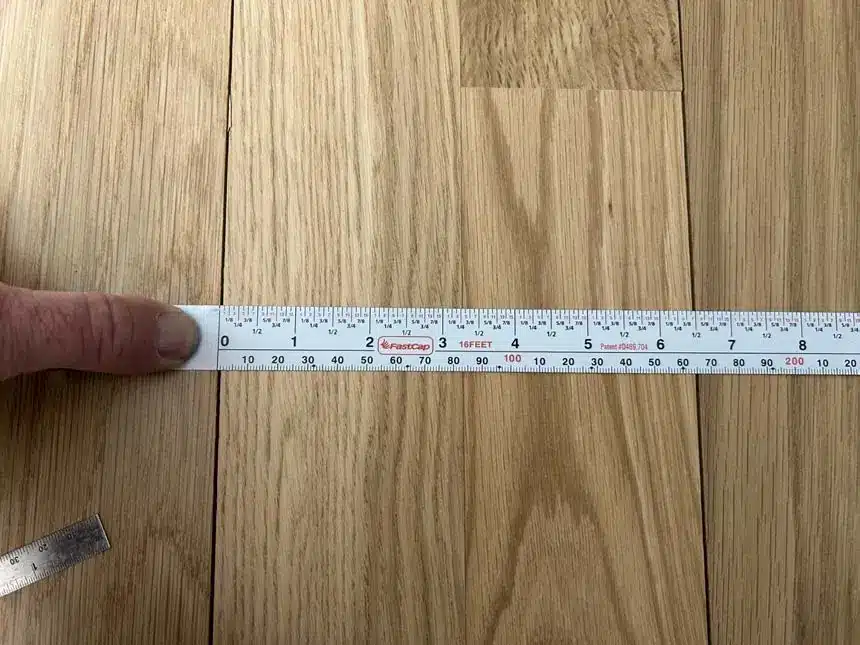
The hardwood examples show a joint opening and a board-dimension check. Locations, repeated patterns, and comparison areas help explain whether an observation is isolated or distributed. A dimension shown in a photograph should be identified clearly enough for a reader to understand what was measured.
A hardwood floor inspection may include relevant moisture and ambient observations, product information, and project history. Photographs from different dates can help document changes when their dates and locations are known. Do not assume that two similar photographs show the same conditions or the same cause.
3. Tile observations and measurements
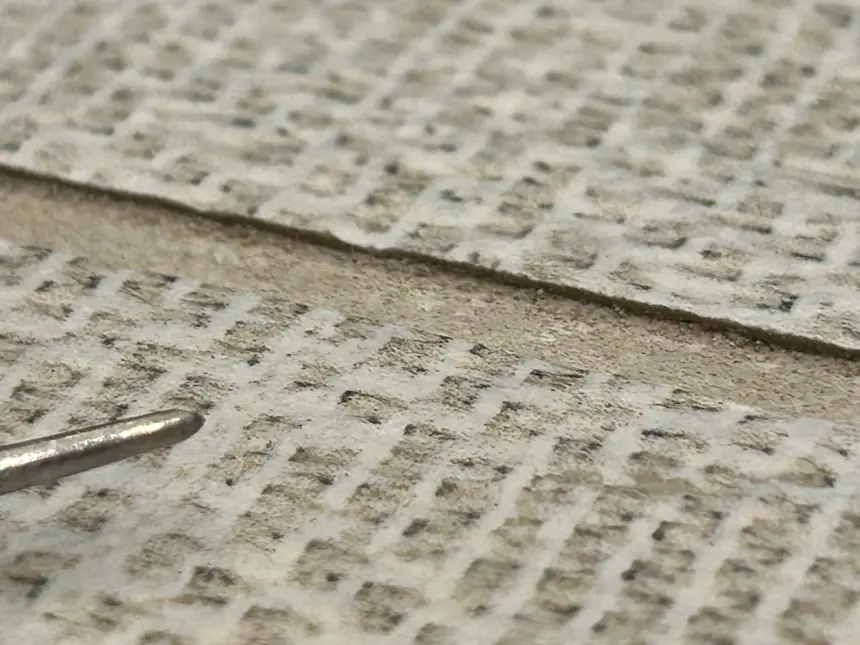
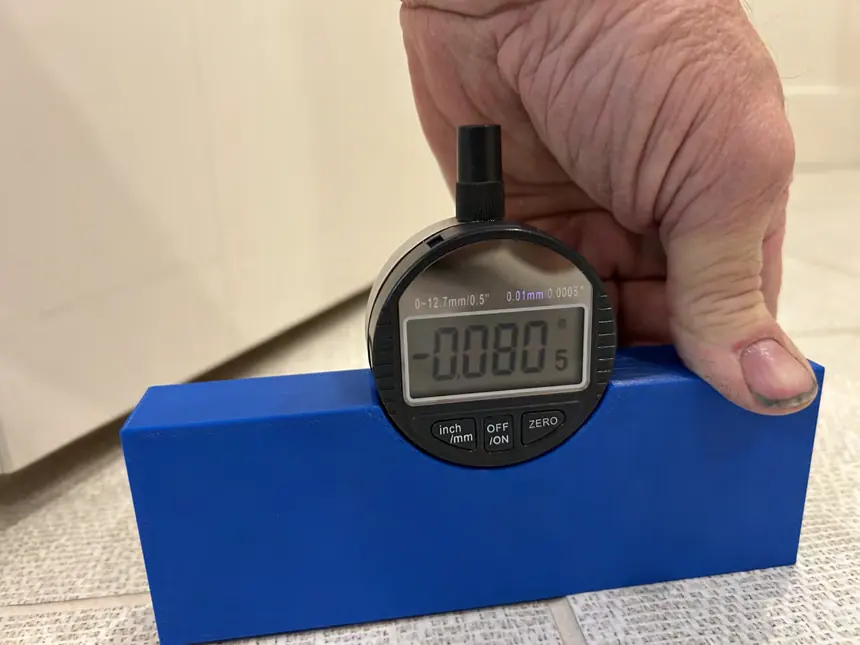
A close view shows the adjacent tile edges; a measurement documents the height difference at a particular location. Tile shape, grout joint details, layout, and lighting can affect how the condition appears in a photograph. The report connects the image to the measurement method and surrounding installation.
See tile lippage inspection for the examination scope. The Tile Council of North America resource center provides general industry information. Applicable requirements must be selected for the actual tile installation rather than inferred from a gallery image.
A photograph is part of the record
The location, pattern, measurements, product information, and surrounding conditions are considered together. These examples do not establish the cause of a different floor’s condition. Your report documents the evidence for your property.
These flooring inspection photos are examples of documentation, not a diagnosis of another property. Original files, location notes, measurements, material identification, and project records are considered together. Where the evidence does not answer a question, the report should make that limitation clear.
When collecting your own photographs, begin at standing distance with enough of the room visible to identify the area. Move closer for the specific concern and keep the sequence organized. Preserve the original image files. Avoid filters, sharpening, retouching, or other edits that could change the apparent condition.
If a repair or removal is already planned, mention the timing when making an inquiry. Record the existing condition when safe, and discuss any needed examination before the evidence changes. Photographing a condition does not require you to lift flooring, disturb a joint, or perform a test yourself.
Discuss your flooring concern
Share the property location, flooring type, the concern, and any important dates. Scope, availability, travel, and fees are confirmed before scheduling.